Refinish or Replace: Deciding What to Do With Tired Kitchen Cabinets
Often the cabinet boxes are fine and only the surface is tired, which is good news for your kitchen and your budget.
October 13, 2026 · 4 min read
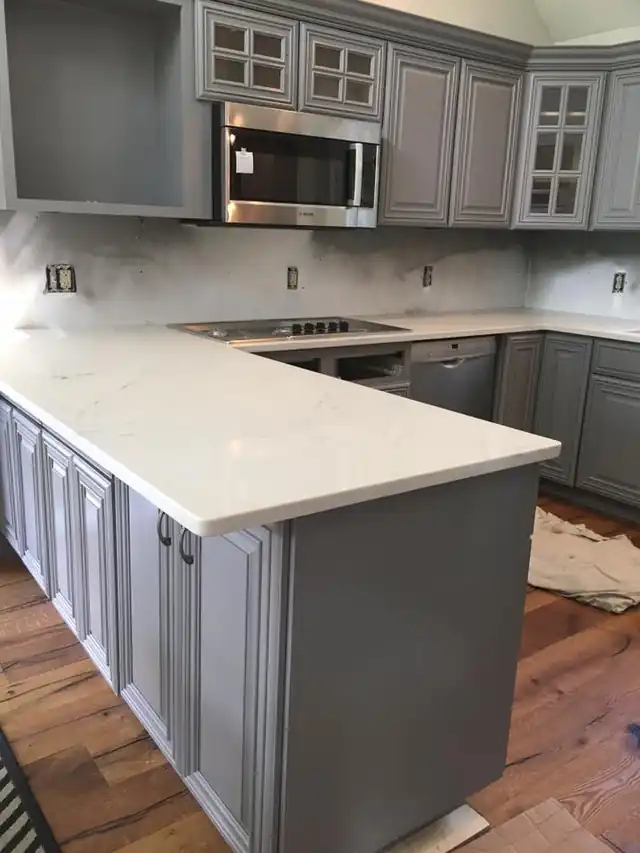
A kitchen can feel dated without anything in it being broken. The doors still close. The drawers still slide. But the finish has gone dull, the corners have worn through around the handles, and the color belongs to a decade nobody misses. Before you start pricing a full tear-out, it's worth asking whether the cabinets you already have are the real problem. Often the boxes are fine. It's the surface that's tired.
At Mera Painting and Home Design, refinishing cabinets is one of the services we're happiest to do, because the change is so visible. Here's how we think about the decision, and what a good refinish involves.
When refinishing makes sense
Refinishing works best when the cabinets themselves are sound. That means solid boxes, doors that hang straight, drawers that run properly, and a layout you can live with. If you like how the kitchen works and only dislike how it looks, a new finish solves the actual problem. These are good signs:
- The cabinet boxes are solid, with no sagging shelves or crumbling panels.
- Doors and drawer fronts are flat and intact, not warped or split.
- The layout works for how you cook and store things.
- The problems are cosmetic: yellowing, chipped edges, worn spots, a color you've outgrown.
- The hardware holes are in the right places, or you're happy to fill them and start fresh.
When replacing is the better call
Refinishing can't fix structure. If the boxes have swollen from years of water under the sink, if laminate is peeling off in sheets, or if the layout fights you every day, paint on top will only hide the problem for a while. The same goes for a kitchen you want to reconfigure, since moving the stove is a remodel.
It's also fine to say that some cabinets aren't worth saving. A good contractor will tell you so. Mera would rather you spend your money once, on the right thing, than pay for a beautiful finish on doors that are about to give out. With a Lead Carpenter on the team, Alex, small repairs like a cracked panel or a loose joint can be looked at before any paint goes on.
What proper prep involves
The finish is the part you see. The prep is the part that decides whether it lasts. Kitchen cabinets are among the hardest-working surfaces in a house. They take hands, steam, grease, splashes and constant opening and closing, and the paint has to stand up to all of it.
A good refinish starts with taking doors and drawer fronts off, labeling them so each one returns to its own opening, and removing the hardware. Everything then gets a serious degreasing, because cooking leaves a film on cabinets, especially near the stove, that you can't see and paint can't stick to. After cleaning comes sanding to dull the old finish and give the new coat something to grip, then repairs: filling dents, nail holes and chips, and smoothing them level.
Next comes a primer suited to the material underneath, since bare wood, old varnish and laminate all behave differently. Finish coats follow, applied thinly and evenly, with light sanding between them where needed. Rushed coats sag. Patient coats lay down smooth.
The rest of the kitchen needs protection too. Cabinet work makes dust, and a kitchen is where people eat. Masking counters, appliances and floors, and cleaning thoroughly at the end, is part of the job rather than a bonus.
Choosing the color
Looking to update tired kitchen cabinets with a kick of color? It's easy to get carried away or to play it too safe, so it helps to work through a few questions in order.
- Look at the fixed things first: counters, backsplash, flooring and appliances. They aren't changing, and the cabinet color has to get along with them.
- Consider the light. A kitchen with a big sunny window can carry deeper colors that would feel heavy in a dim room.
- Think about the whole house. A color that flows from the kitchen into the dining room feels deliberate, while one that clashes feels like a mistake.
- Decide how bold to go. White and soft neutrals are timeless. A deeper green, navy or charcoal on the lower cabinets with lighter uppers adds personality without overwhelming the room.
- Test a sample on an actual door, and look at it in the morning, the afternoon and at night.
If you're stuck, our Color Consultants can help. A fresh set of eyes on swatches, light and the rest of the room often saves people from the color they'd have regretted.
Living with your refinished cabinets
Once the work is done, a few habits protect it. Be gentle while the finish hardens. Your painter should tell you how long that takes, because it depends on the coating. Don't tape or stick anything to the doors, and avoid slamming them, since a fresh finish chips more easily on sharp contact.
For everyday cleaning, use a soft cloth and mild soap, not abrasive pads or strong cleaners. Wipe up splashes soon after they happen.
If you're weighing refinishing against replacing, we're happy to look at your cabinets and give you a straight answer. Call Mera Painting and Home Design at 973-885-1160 for a free estimate. Every job comes with a warranty, so you'll know where you stand after we leave.
Mera Painting & Home Design, 973-885-1160
Call 973-885-1160More articles
Why Paint Fails on Dirty Siding, and What to Do Before the First Coat
A fresh coat is only as good as the surface under it, and most early paint failures start with dirt nobody saw.
What Lead-Safe Painting Looks Like in an Older New Jersey Home
Lead-safe work is mostly about dust: keeping it small, keeping it contained, and truly removing it at the end.